Rocksprings Crafts
  • Home
  • About me
  • My Crafty Blog
    • Link Parties I attend
  • Book Reviews
  • Health and Well-being plus the occasional Cake
  • Disclosure Policy
  • Tools of the Trade

All My Crafty Thoughts

Patchwork, quilting,embroidery, basically anything to do with fabric and thread I'll have a go at and talk about it here

Beginners Sampler Quilt, v1 finished

25/5/2014

8 Comments

 
Picture
Back in  the summer of 2012 Michele from the Quilting Gallery started a Quilt-Along aimed at beginner quilters.  Although I'm not a beginner I had never made a sampler quilt and had never taken part in a mystery quilt. I thought this quilt-along would be a good opportunity to do both of those things and to refresh some skills and learn others.  When I first started quilting we all used cardboard templates to draw around and scissors to cut out fabric, roller cutters, cutting mats and specialist rulers had not become the norm.  

I hoped that by following the quilt-along I would learn some new to me  techniques that are standard practise to quilters these days.  Also I planned to see if I could use my AccuQuilt Go! to cut pieces accurately and quickly.  I decided to make three quilts in total, one using techniques I was familiar with, one using the instructions given by Michele and one using the AccuQuilt Go! for as many blocks as possible.  I started by making the blocks using Michele's instructions.

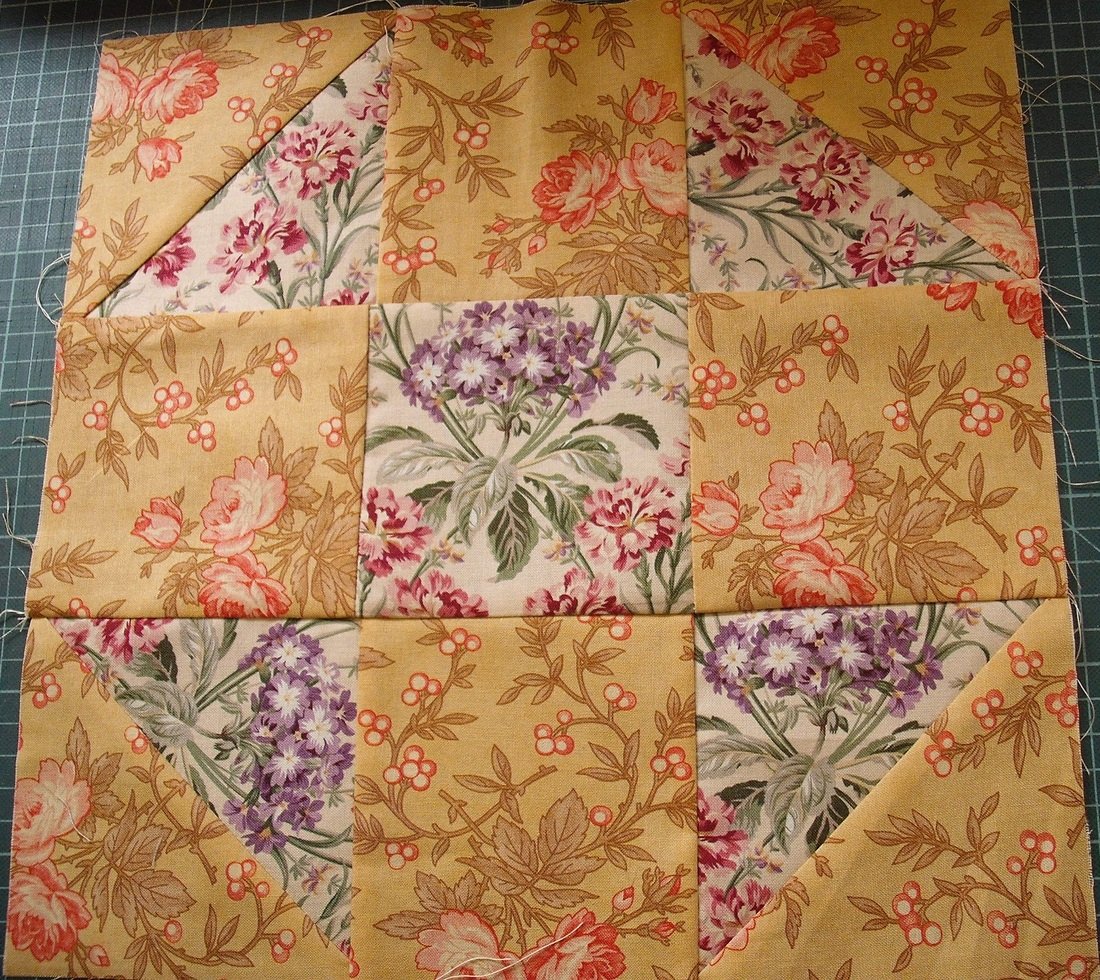
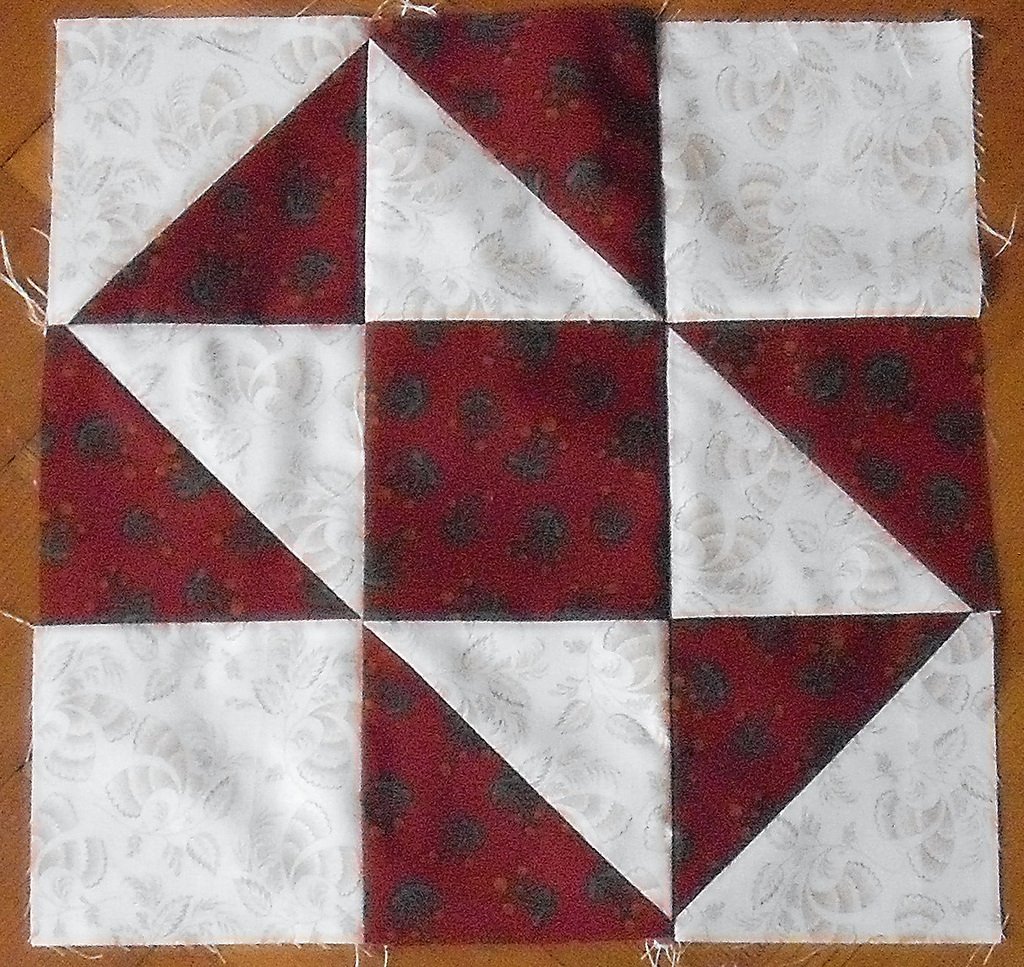
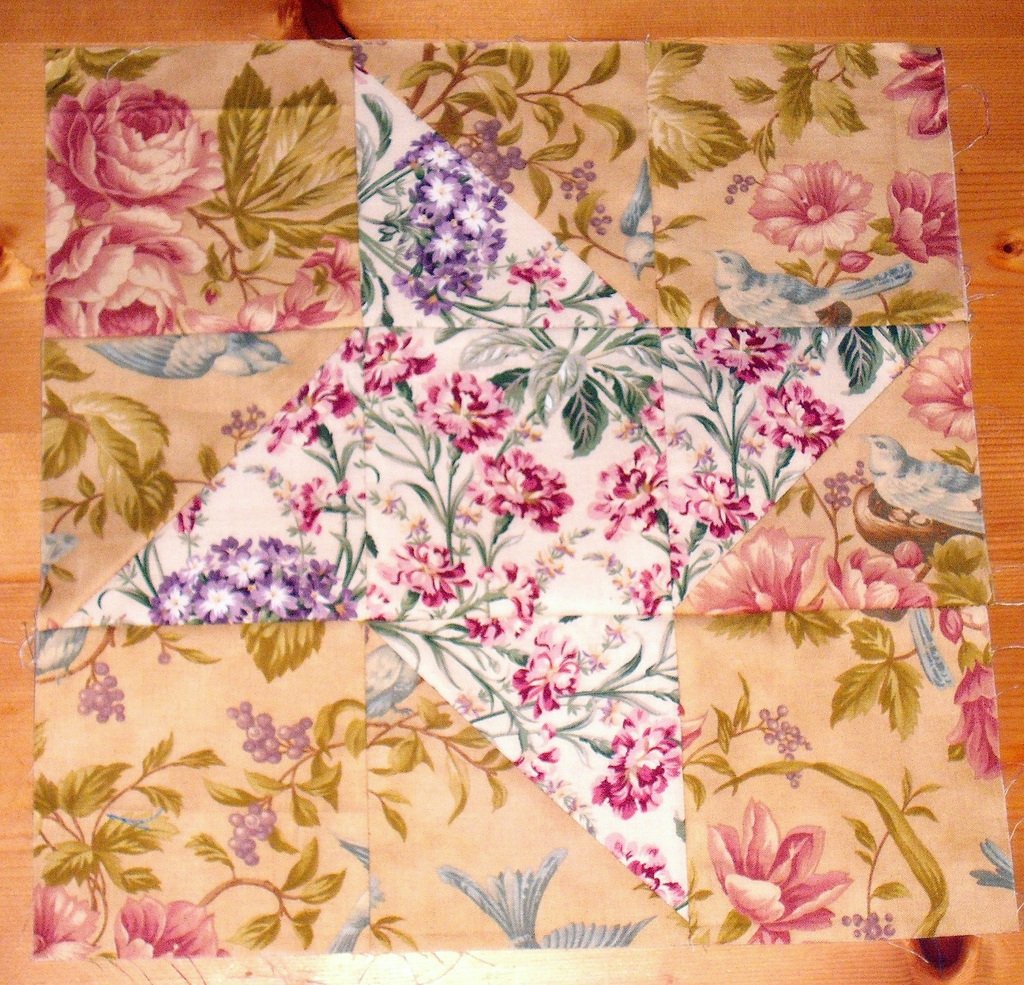
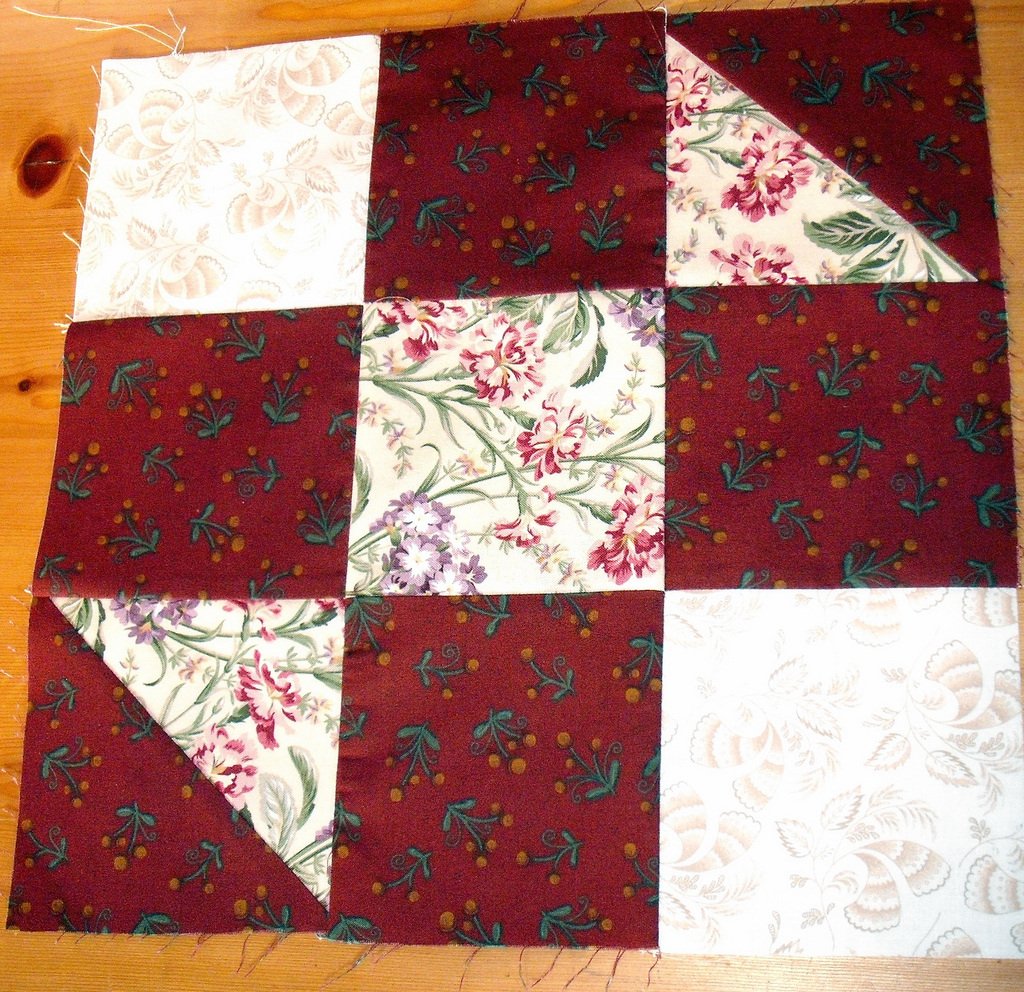
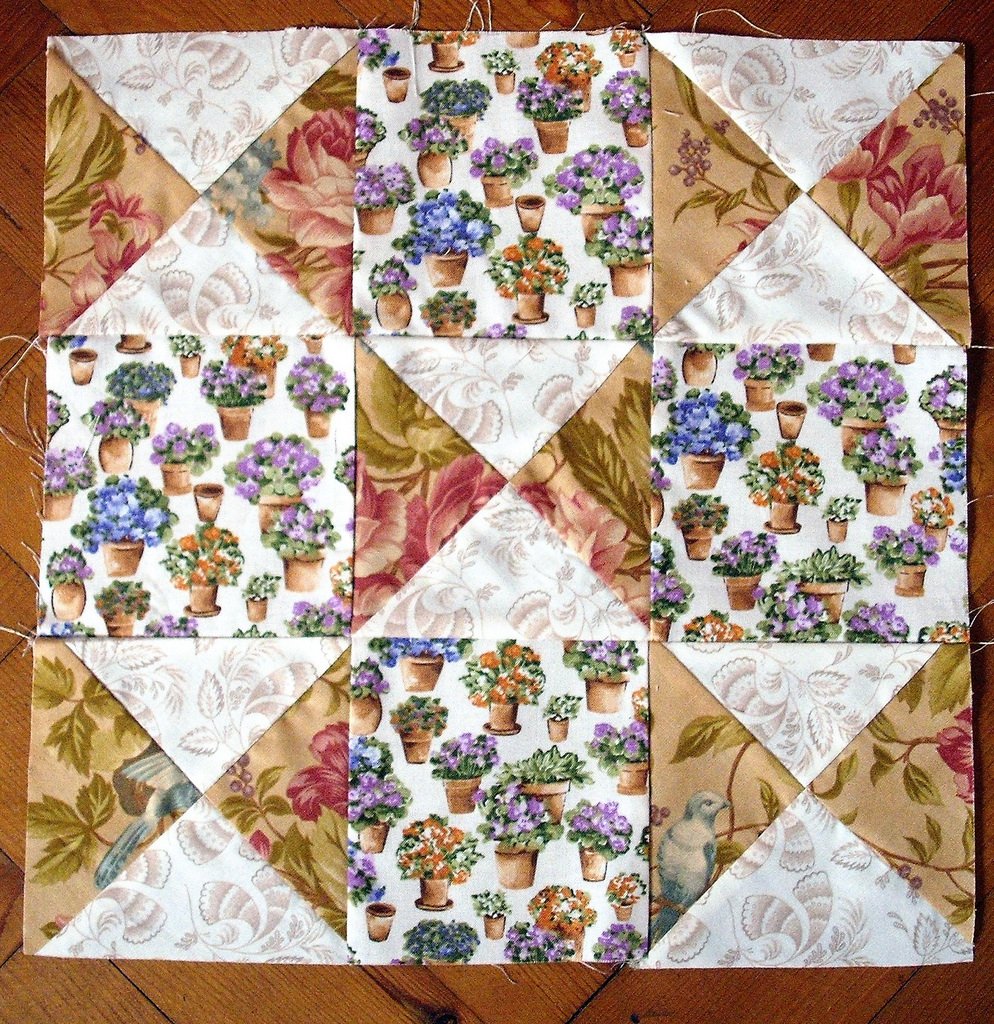
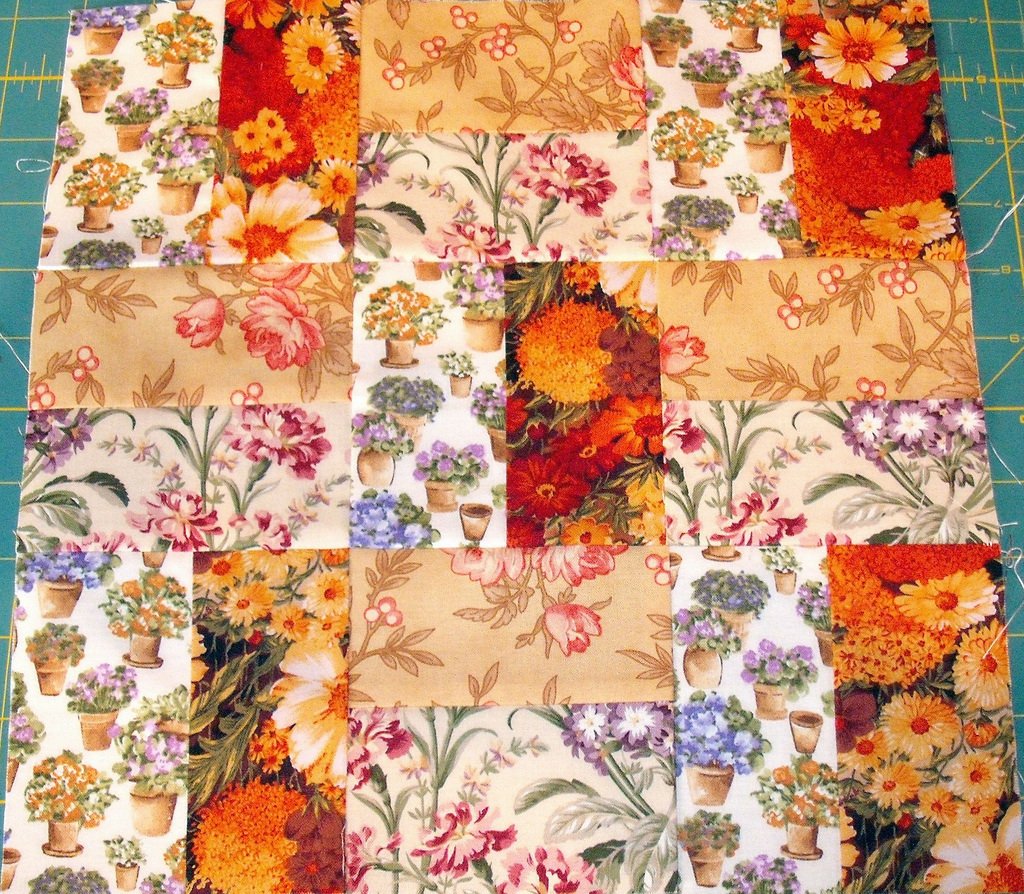
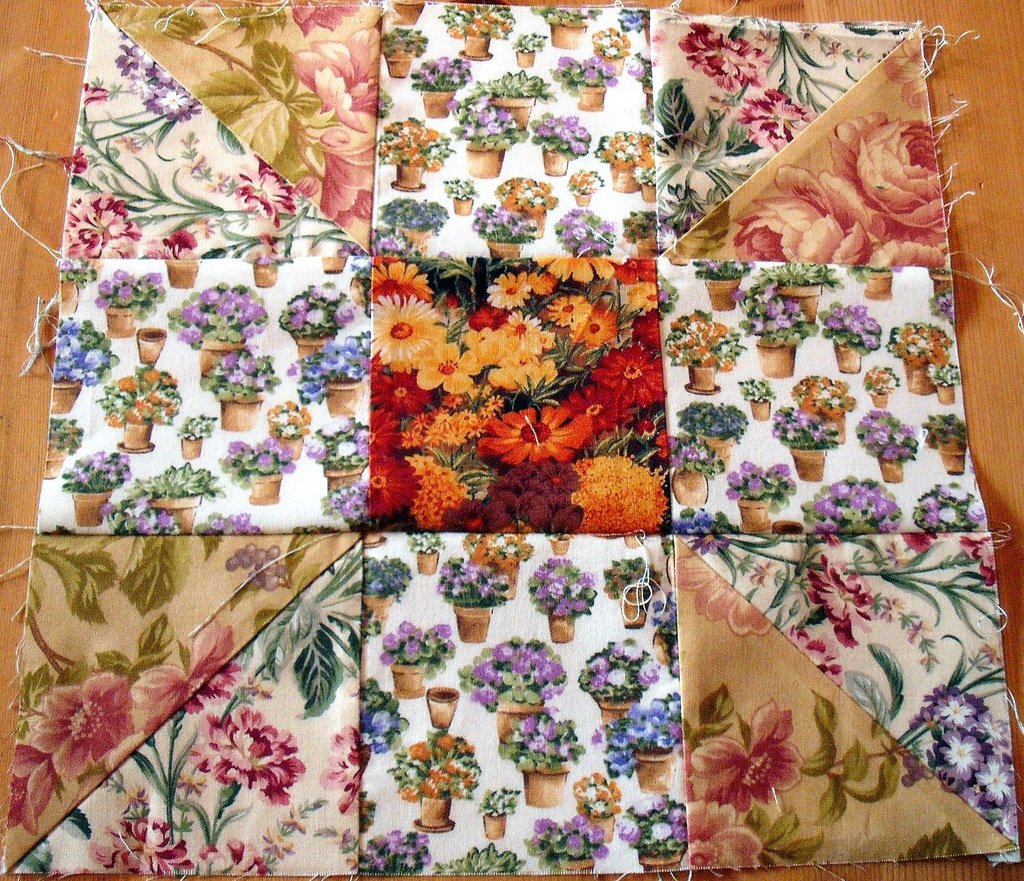
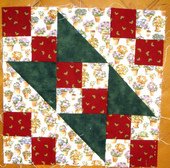
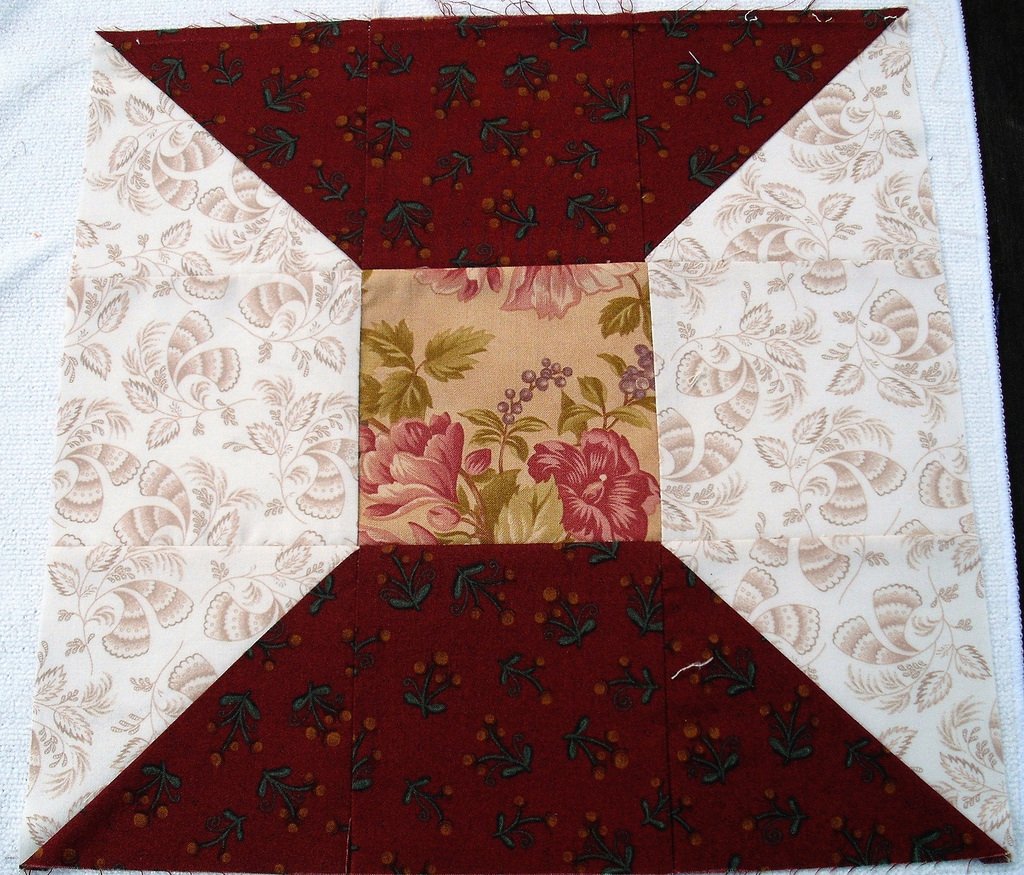
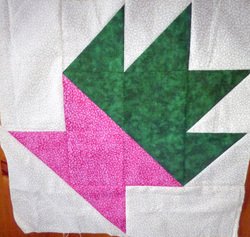
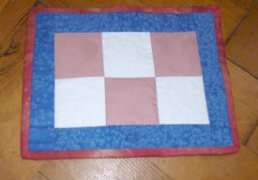
The individual blocks were
Picture
Picture
Picture
Picture
Picture
Picture
Picture
Picture
Picture
Picture
Picture
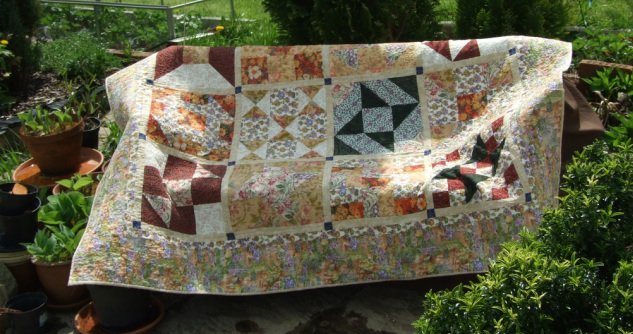
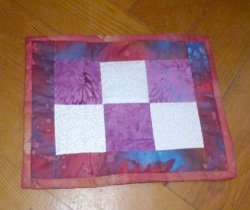
I thoroughly enjoyed making the blocks each week and joining in with the discussions about the quilt-along on Flickr many people posted weekly pictures of their blocks and it was fascinating to see how different the end results were when all of us started from the same place.  The three sets of blocks I made all look very different.  This one is made from fabric I already had in my stash and the link between the blocks was flowers.  All the blocks have flower fabric in them and most of the blocks have two flower fabrics of different scales.  The second set of blocks is also made from fabric in my stash and is a scrappy blue quilt and the third is fabric purchased especially for the quilt-along and is called Dandelion Daydreams by Maywood Studios.  because a lot of the flower fabric is directional I spent a lot of time making sure the pieces were cut and sewn together the right way up.   

After completing all the blocks for all three quilts I needed to take a break from the project.  The break went on for a lot longer than I anticipated.  I found myself worrying about making choices for borders, scared of the quilting process and generally finding excuses not to move forward with finishing the quilts.

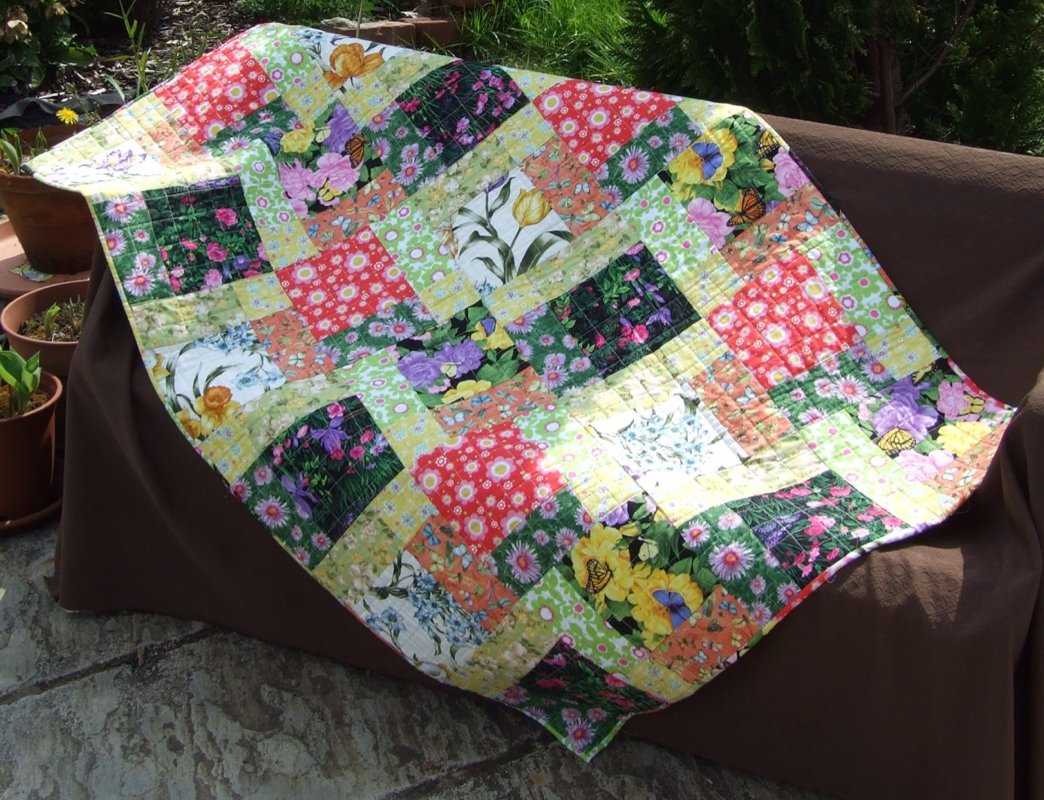
For this quilt, once all the effort of keeping the fabric in the blocks the right way round was completed, it looked to me as though it was a typical English country garden and so when I found some fabric that continued the theme I knew I had the right border fabric to finish this quilt.  Once again I had to make sure the fabric was cut and attached so that it is all the same way up but it was worth the effort as the border really compliments the blocks.

I then had a few panicked moments over the possibility of ruining everything while trying to quilt it on my domestic sewing machine.  Eventually I came to my senses and remembering that the object for this year is to finish things and applying the maxim that done is better than perfect I took a deep breath,put the quilt top under the sewing machine and free motioned it.

It is far from perfect but it is done.  At the moment it hangs on a wall and I'm the only person who sees wonky quilting and not matching seams.  

Now I just need to finish the other two quilt tops.
8 Comments

Spring Exuberance completed

24/4/2014

11 Comments

 
Picture

The fabric for this quilt was an impulse buy at the Spring Quilt Festival at Westpoint, Exeter. I promised myself at the beginning of the year that impulse purchases would be used straight away and not tucked into the stash and forgotten about for months.

The pattern is a Dissapearing Nine Patch, a block I've never tried before and the floral fabrics all seemed to represent springtime to me. With so many busy fabrics I decided that simple quilting was all that was needed and so an all over grid with the walking foot I also just happened to buy at the show finishes it off nicely.

11 Comments

Block Swap Adventure: January Block received

9/2/2014

0 Comments

 
Picture
This beautiful block arrived in the post the other day.  It is my block for the January swap of Block Swap Adventure.  This group is such fun to be a part of, I always receive lovely blocks and it is fascinating to see how other people interpret my request.  So many different colours used to make this Cactus Block over the past year but they all work as a whole.  Must start quilting them soon and get a bed quilt completed.

If you like the idea of making a block for someone else and in return receiving a block made especially for you have a look at the BSA website and join in with us.


0 Comments

Block Swap Adventure January Block

2/2/2014

0 Comments

 
Picture

My partner this month asked for a Bonnie Hunter Crayon Box block. I had never come across this one before so I went straight to Bonnie's website to find out more about it. Of course I got distracted by all the lovely things on the site and it took me a while to work my way down to the block instructions. Once I found the instructions the block was simple to make. My partner had requested that the block colours should be red,white,and black. All my fabrics in these colours looked to Christmassy for a January block and so I was forced to go buy more fabric. Although I like the fabrics individually and it's a quick and easy block to put together this is not a block that appeals to me personally. I like scrappy blocks and I like string pieced blocks but this variation is not to my taste. I enjoyed making it for my partner but would not make it again for myself.

0 Comments

Foodie Pen Pals January 2014

1/2/2014

1 Comment

 
Picture
This month's parcel came from Susan, who is a fellow Fitbit user, (more about Fitbit in another post).  She sent me a lovely parcel, a great deal of which disappeared very quickly.

I love peanuts, these were hardly out of the box before I was opening the packet and gobbling them down.  Very Tasty.

I don't know how Susan knew I have just bought the best pan ever for cooking risotto but it has become a passion this year and so when I saw this packet of Risotto con Peperoni I knew it had to be taste tested very quickly.  It cooked up so easily and the kitchen smelled wonderful as it did so, the packet easily made four servings so on day 1 it was served hot with stuffed roasted peppers and on day 2 it was mixed with the vegetables that hadn't made it into the peppers, some tinned tuna, topped with a bit of grated cheese and heated through until the cheese melted.  Delicious on both days.  I will be looking for this when food shopping as it is so tasty.

The teas were incredibly refreshing and made a lovely change from fruit tea or coffee.

The carrot and pecan trail mix was put in my backpack when I went walking this week but didn't make it home.  Very, very moreish.  At least i was exercising so I didn't feel too guilty about eating it all in one session.

I haven't tried the paella spices yet or the african pepper but neither has made it into the spice drawer.  Both are sitting by the hob waiting for the first possible excuse to use them.  I think the paella spices might be tried tonight as rice is on the menu and the pepper won't be long before it is tried.

As usual this was a fun parcel to receive, I have never yet been disappointed with a parcel, and I have had the chance to try foods I have not previously known about.

If you like the idea of getting a parcel full of foodie treats each month and would like to know more about it all have a look at This is Rock Salt for those of you in the UK and Europe or The Lean Green Bean for those of you in the USA and Canada.
1 Comment

Crafty Cats Cross Stitch

10/1/2014

3 Comments

 
Janlynn Cat Cross Stitch
Picture

This cross stitch is one of the many UFO's that demand my attention. It's the one I've decided to concentrate on first this year simply because it was at the top of the pile and that seemed as good a reason as any other. When it's completed it should look like this.

Picture
Janlynn Cat Cross Stitch

Finishing the ginger cat is the only really complicated bit left to do and that takes time as the colour changes are so frequent. Once he is out of the way the lettering should be plain sailing. Let's see how it looks at the end of the month.

3 Comments

Crafty Resolutions for2014

6/1/2014

0 Comments

 
This is the time of year when I look back over the past 12 months and try to analyse what has happened, what i have achieved and where I need to improve in order to have focus on the coming year. After having given the matter due consideration I can then set goals for the coming year.

  It is possible to sum up all  my craft related goals for 2014 in two words  

                                                 FINISH THINGS

But it is probably more useful to break that down into a workable list so 

1) Complete one UFO(unfinished object) or PhD(project half done) every month. Doesn't matter if this is quilting, cross-stitch, hand knitting or Bond knitting, pick a started project and finish it.
2) Organise my stash and all the sundries that have built up over the years.  Declutter if necessary so that it all fits in the space I have and I I can find stuff when I want it, at the moment I end up buying a replacement of something I know I have simply because I can't find the original. 
3) Learn some new techniques. By actually watching some of those Craftsy classes I signed up for and then putting those ideas into practise I will be a better craftsperson at the end of the year than I am now.


I would expand further but there is a half done cross stitch kit that needs some attention if I am going to get this resolution off to a good start.
0 Comments

Our Holiday in Portugal

17/11/2013

0 Comments


Our first full day here and already feeling much more relaxed than I have done in ages. It's surprising what a bit of sunshine and warm weather can do. Let's see what the rest of the week has in store.

Picture
Views from our apartment.
0 Comments

Sunshine Quilting

15/7/2013

2 Comments

 
Picture
What do you when the weather is beautiful and sunny but you still want to do some quilting.  In my case take a project or two outside.  I've had the tops of these two mugrugs sewn for ages for had not got around to quilting or binding.  Today was the perfect day for sitting in the garden and practicing a bit of hand quilting and sewing on a binding by hand.  A productive day and enjoyable day.

Picture
2 Comments

Quick Make Mini Quilt

1/7/2013

5 Comments

 
On a recent trip to the local quilt shop I bought a packet of fat 1/8ths that were just irresistible in the shop.  When I got them home and opened them up I wasn't as fond of them as I had been in the shop.  Nothing wrong with them but they no longer called my name.  I knew that if I didn't do something with at least a couple of those fat 1/8ths straight away the whole packet would languish at the back of the stash making me feel guilty every time i laid eyes on it.

I decided I might as well use the fabric to practice some techniques that either I am not very good at or had never even tried before.  Out came the Accuquilt Go! and the 1.5" strip cutter.  I cut three of the fat 1/8ths into strips and then sewed together the strips in a light/dark/light sequence.  After careful pressing I checked the width at several place down the strips and they remained 3.5" all the way down.

Next out with the rotary cutter to subcut those strips into squares.  A few minutes later and I had lots of lovely 3.5" squares.  

The next challenge was to sew all those squares together into an 18" x18" square while keeping all the points matching.  The beige fabric is actually two different fabrics, one with red highlights and one with black highlights, making sure I kept the sequence correct meant a lot of concentration but I did it.

Then onto free motion quilting, I'm always nervous before attempting to FMQ but this time I just put the fabric under the machine and went for it! 

The quilting is easier to see on the back and I'm not too disgruntled with it.  Every time I try FMQ I get a little bit better at it, just need to find more time to practice.  

The last thing to do was add the binding.  Usually I'm very traditional (stuck in a rut) when it come to binding, it's 2.25" wide, folded in half, machined from the front and hand stitched on the back.  As everything else was experimental I thought I might as well try something new with the binding.  I cut the binding strip at 1.5" and sewed it single fold at a very scant 1/4" to the front of the quilt.  Wrapped the binding over to the back ,folded it in half and pinned it in place, then using the machine very carefully stitched in the ditch from the front of the quilt to finish binding.  For small items like this mini quilt which will end up on the coffee table or mug rugs or place-mats that are likely to be in and out of the washing machine frequently this technique gives a sturdy finish but it's not as neat and unobtrusive as a hand sewn binding, but then maybe a bit more practice will help solve that problem.

Because I hadn't invested a lot of time and effort or my favourite  fabric into this project I was a lot more willing to tolerate things going wrong which meant I was a lot more relaxed about the whole process and less things did go wrong.  It has reminded me of the value of just playing and practicing with fabric and the sewing machine without having any real expectations of the end product and somehow I managed to end up with a lovely little table topper. 
5 Comments
<<Previous
Forward>>
    Craftsy
    Blogger Outreach Made Easy Quantcast

    RSS Feed

    Follow this blog
    QuilterBlogs
Proudly powered by Weebly