3 blocks made with pieces cut by the Accuquilt Go! on dies 55059 and 55063
My Accuquilt Go! is my favourite quilting gadget, of all the different bits and pieces I have bought over the years this is the absolute best investment I have made. I know these die cutting machines cost a lot but they are worth every single penny and since I have had mine the accuracy of my piecing has improved leaps and bounds because the pieces are all cut the exact right size.
A few days ago I had the opportunity to spend some time with friends doing nothing but our own favourite crafting. We hired the local village hall for the afternoon and spread out sewing machines, fabric, cross stitch, knitting etc. to our hearts content. There was plenty of space to play and between the seven of us it cost about the same as each of us buying a fancy cup of coffee.
A few days ago I had the opportunity to spend some time with friends doing nothing but our own favourite crafting. We hired the local village hall for the afternoon and spread out sewing machines, fabric, cross stitch, knitting etc. to our hearts content. There was plenty of space to play and between the seven of us it cost about the same as each of us buying a fancy cup of coffee.
Along with my sewing machine I took my Go! some fabric and two dies. The dies were
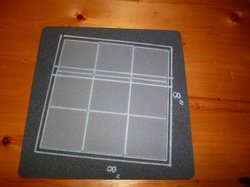 Go! Square 2" Finished Multiples (55059) | 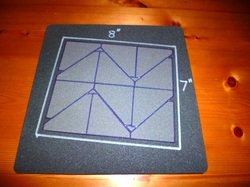 Go! Half Square Triangle 2" inch Finished square multiples (55063) |
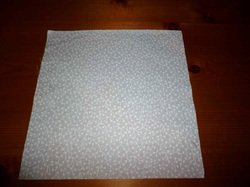
and the fabrics I took with me were these
 |  |
I put 4 layers of fabric (two patterned and two white) on each die and rolled them through the cutter. The cutter will take up to 6 layers at a time but I'm most comfortable working with 4.
These eight layers cut the pieces for nine blocks in less than a minute. Because I knew I would not have the time to sew all the blocks that afternoon I divided the pieces up into the correct amount needed for each block and placed a blocks worth into a plastic bag.
I then took a bag at a time and started to sew the pieces into blocks. Each unfinished block measures 12.5" x 12.5" The sewing together of the blocks took longer than anticipated as I was too busy at times chatting with friends and allowed my attention to wander. This meant that each block, at some point, had a row sewn on upside down. More frogging was done than normal but eventually I had three completed blocks.
I had not given much thought to the overall finished pattern but when I started playing with different settings for the blocks the one with the centre star just jumped out at me. All I need to do now is sew together the blocks I have already cut. Sew the blocks together and then decide if I want to make it larger, I do have extra fabric in the stash if needed and then make sure it is quilted and the binding applied so that I can call it a 2014 finish.
We have decided to book the village hall for an afternoon once a month for at least the next three months so even if I don't get much time at home to play with basic piecing and quilting I will have this dedicated time to use to finish the quilt.
 RSS Feed